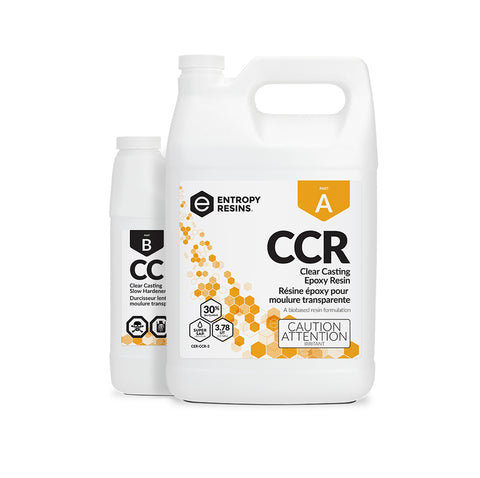
Casting Epoxy

PREPARATION
PREPARATION FOR EPOXY CASTING
Casting epoxy is a popular technique among artists, artisan furniture builders, and jewelry makers. Here are some tips for getting the best results when casting epoxy.
MOLDS
BUILDING AND SEALING MOLDS
There are many different materials you can use for making molds. Silicone, smooth plastics such as polyethylene, metal, and melamine coated MDF are some of the more common. Take time and care to completely seal the area you plan to fill. CCR is a thin and slow cure epoxy. Once a leak starts, it’s hard to stop.
- For sealing seams and joints, you can use wax, caulks, hot glue, and plastic-backed tape. Make sure to test when using tape. Some adhesives on tapes weaken when in contact with the epoxy. Also, check to ensure that the sealant you choose adheres well to the mold surface and is color stable so it does not transfer color to the casting.
- To seal the mold surface, use mold release agents to ensure the epoxy releases easily. Paste wax, spray wax, chemical release agents, and PVA are common types of mold release agents.
- When casting or embedding a porous substrate or material, make sure to seal its surface with epoxy or shellac to prevent the outgassing of air into your casting.
CALCULATING
CALCULATING RESIN USE
For best results, use CCR Clear Casting Epoxy. Here’s how to calculate how much CCR Resin and CCF Fast or CCS Slow hardener you’ll need for your casting project.
1.5 Liter (3 pint) = 1420cm3
3 Liter (3 quart) = 2840cm3
6 Liter Kit (1.5 Gallon) = 5680cm3 [Best Seller]
12 Liter Kit (3 Gallon) = 11360cm3
To calculate required amount of epoxy for your project calculate the volume of your pour in cm3 and divide that by 5680, then round up. For example…
Pour Area: 21 cm x 183 cm x 6 cm = 23058cm3
Required Mixed Epoxy: 23058/5680 = (4) 1.5 Liter kits
Kit Size To Purchase: (2) 12 Liter
For best results:
Do not pour CCR/CCF (fast) in layer thickness more than 0.635 cm in a single pour.
Do not pour CCR/CCS (slow) in layer thickness more than 2.54 cm in a single pour.
**If you need to pour layer thicknesses larger than the above specifications, multiple pours are required. Be sure to let the initial layer cure sufficiently so that the two layers do not mix when pouring subsequent layers.
COLOUR
ADDING COLOUR
Generally, you can add coloring agents to the mixed epoxy up to 5% by volume with minimal effect on the cured epoxy’s strength. Always make test samples to check for desired color and opaqueness and for proper cure. Coloring additives don’t provide UV resistance to the cured epoxy. Limit their use to areas that won’t be exposed to sunlight, or add a UV protective coating such as a 2-part urethane varnish after the epoxy has cured.
You can add powdered pigments (tempera paint, colored tile grout, aniline dyes) and universal tinting pigment to the epoxy mixture to tint it any color. Acrylic paste pigments can also be used to tint the mixture, as long as their manufacturer has specified them for use with polyester or epoxy resin.
DEGASSING
DEGASSING CCR FOR CASTING
Using a vacuum degassing chamber is an effective way to remove entrapped air bubbles from Entropy CCR epoxy. Degassing is most effective when using CCR Resin and CCS Slow Hardener because of its long pot life. You should maintain a vacuum pressure of at least 25 inches of mercury (Hg) for 5- 10 minutes to remove air bubbles. The volume of epoxy used will have an effect on the epoxy’s overall exothermic heat, so time under vacuum may need to be modified for your epoxy casting. A variety of different size vacuum chambers are available online, we recommend using one with a clear lid to see the air bubbles rise to the top of the epoxy. Degassing will help remove extremely small bubbles that can be difficult to remove unless a vacuum chamber is used.
POURING
POURING EPOXY
- Once the mold is prepared and sealed, mix a batch of epoxy. To ensure thorough mixing, follow the instructions in Dispensing, Mixing and Measuring in Basic Instructions.
- Pour the first layer into the mold or on the surface. Depending on the dimensions of the total casting and the hardener you’ve selected, you may need more than one casting layer to prevent the epoxy from overheating, also called uncontrolled exotherm. The limitations of the pour-depths for CCF and CCS are listed below. For excellent clarity in an epoxy casting, it’s important to prevent bubbles while mixing and pouring the epoxy. Learn about preventing bubbles in epoxy see Bubble-Free Coatings and Castings.
- If more than one pour is required, apply a second or subsequent pour of epoxy until the casting reaches your desired thickness/volume. Pour the next layer when the previous pour is about as tacky as masking tape. To avoid sanding between pours, apply all of the pours when previous pours have cured to a tacky stage and not beyond the gel stage. Use an infrared temperature gun or another temperature device to monitor the surface temperature of the epoxy. If the epoxy is still hot, it will cause the next layer to heat up more quickly and could cause an uncontrolled exothermic reaction.
- After the final coat, let it cure thoroughly before sanding or adding a topcoat.
CCF LIMITATIONS
When using CCF for a large pour such as a bar top, and filling large voids, the depth of the pour should not exceed ½” deep. You can do smaller castings of 7 oz. or less in almost any shape and depth.
CCS LIMITATIONS
When using CCS for a large pour such as a bar top or when filling a large void, the depth of the pour should not exceed 1-inch deep. You can do smaller castings of 16 oz. and less in almost any shape and depth. When working with epoxy in a casting less than ⅛” thick or less than 7 oz. total volume, we recommend switching to CCF Fast Hardener for faster through-cure.
Limitations are based on 72ºF ambient temperature. Higher ambient temperature, unique mold shape (narrow and tall), and molds with good insulation factors can cause an exothermic reaction even within guidelines. Mildly excessive exothermic reactions can cause discoloration (yellowing) of casting.
FINISHING
The final step
POST CURING
After the initial cure (tack-free) is complete, post-cures can reduce the length of time to full cure or meet the requirement of a post-cure to reach full properties. There are two recommended post cures to achieve the epoxy’s full physical properties.
100ºF for 8 hours after 3 days at 77ºF
100ºF for 24 hours after 24 hours at 77ºF
TOP COATING
See section on adding a UV stable topcoat in Basic Instructions.
SUGGESTED USES:
- Clear Casting
- Bar Tops
- River Tables
- Jewelry
- Art Castings
- Embedments
Interested in learning more about Entropy Resins, click here to learn more about the benefits of using eco-friendly resins on your next DIY Surfboard project.